
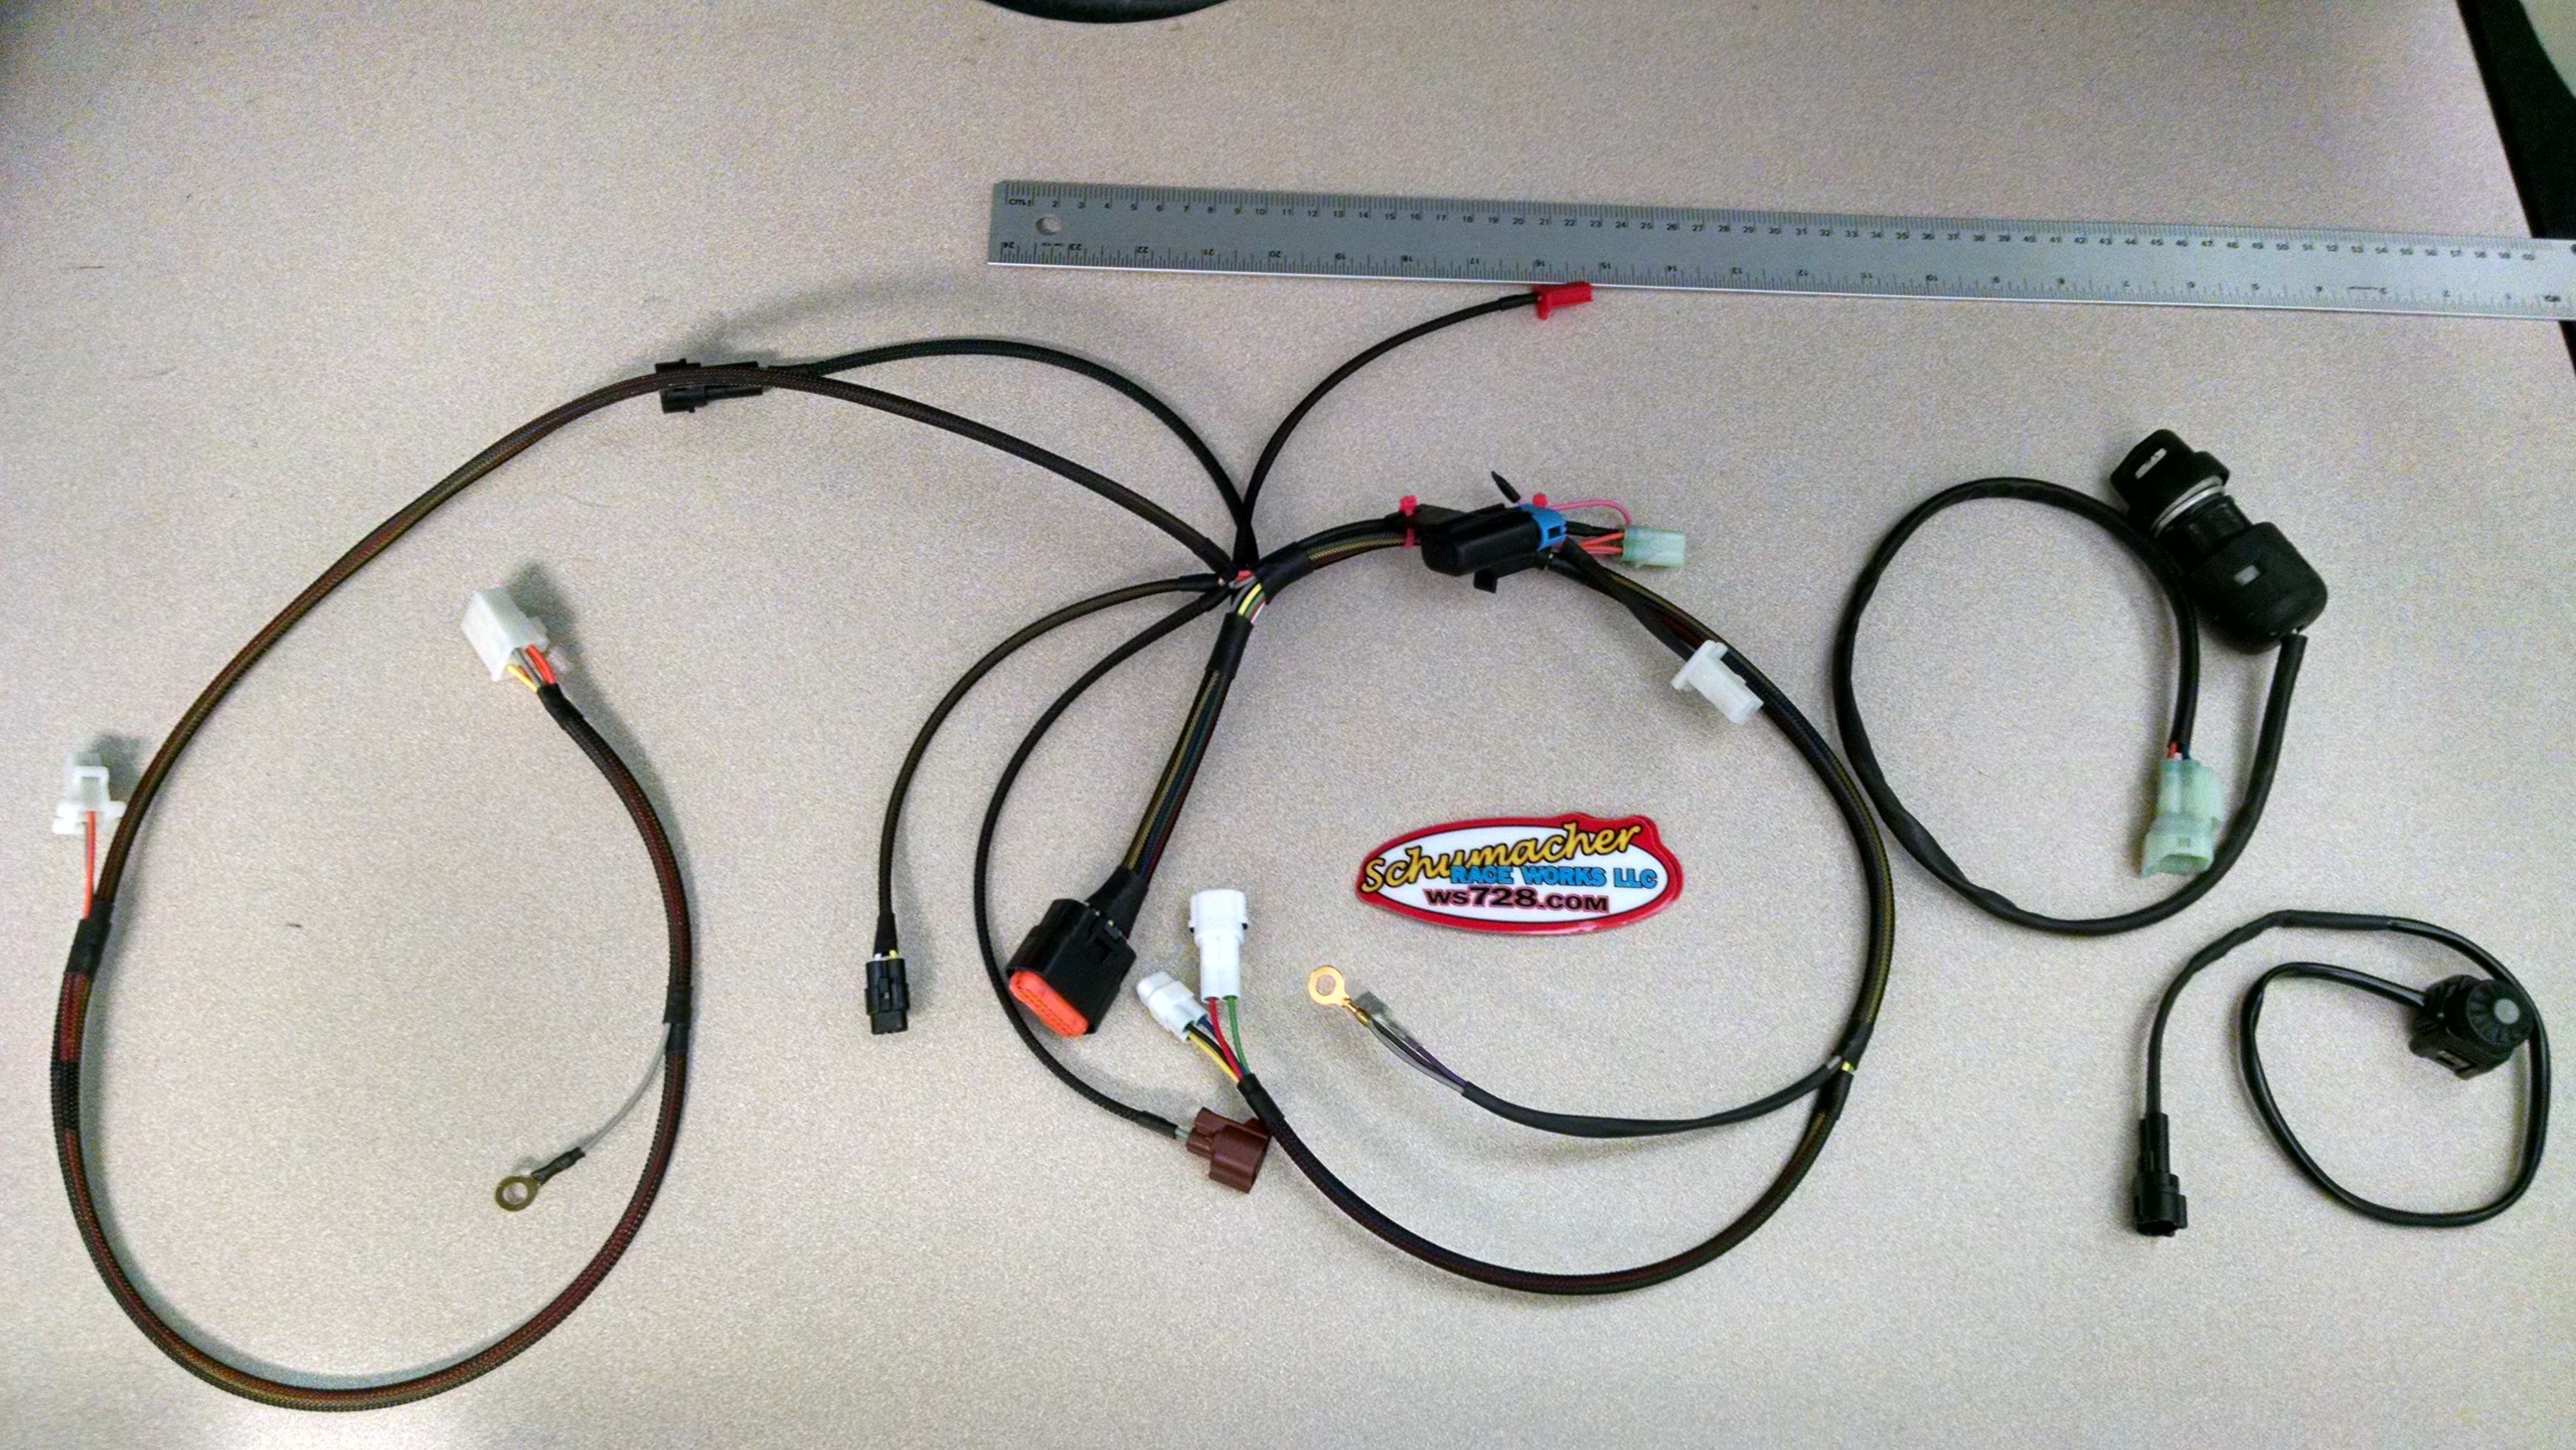
When I built my 2015 KTM 525 XC Race ATV from all new parts, one of the few OEM parts that I did not use was the wiring harness. Over the years, I had had a few electrical challenges and that lead me to solve them the only way I know how, by buying the correct tools and building a better part to start with. Pictured below is my Schumacher Race Works 450/525 XC Competition Wiring Harness, with sealed connectors for the key switch and start button.
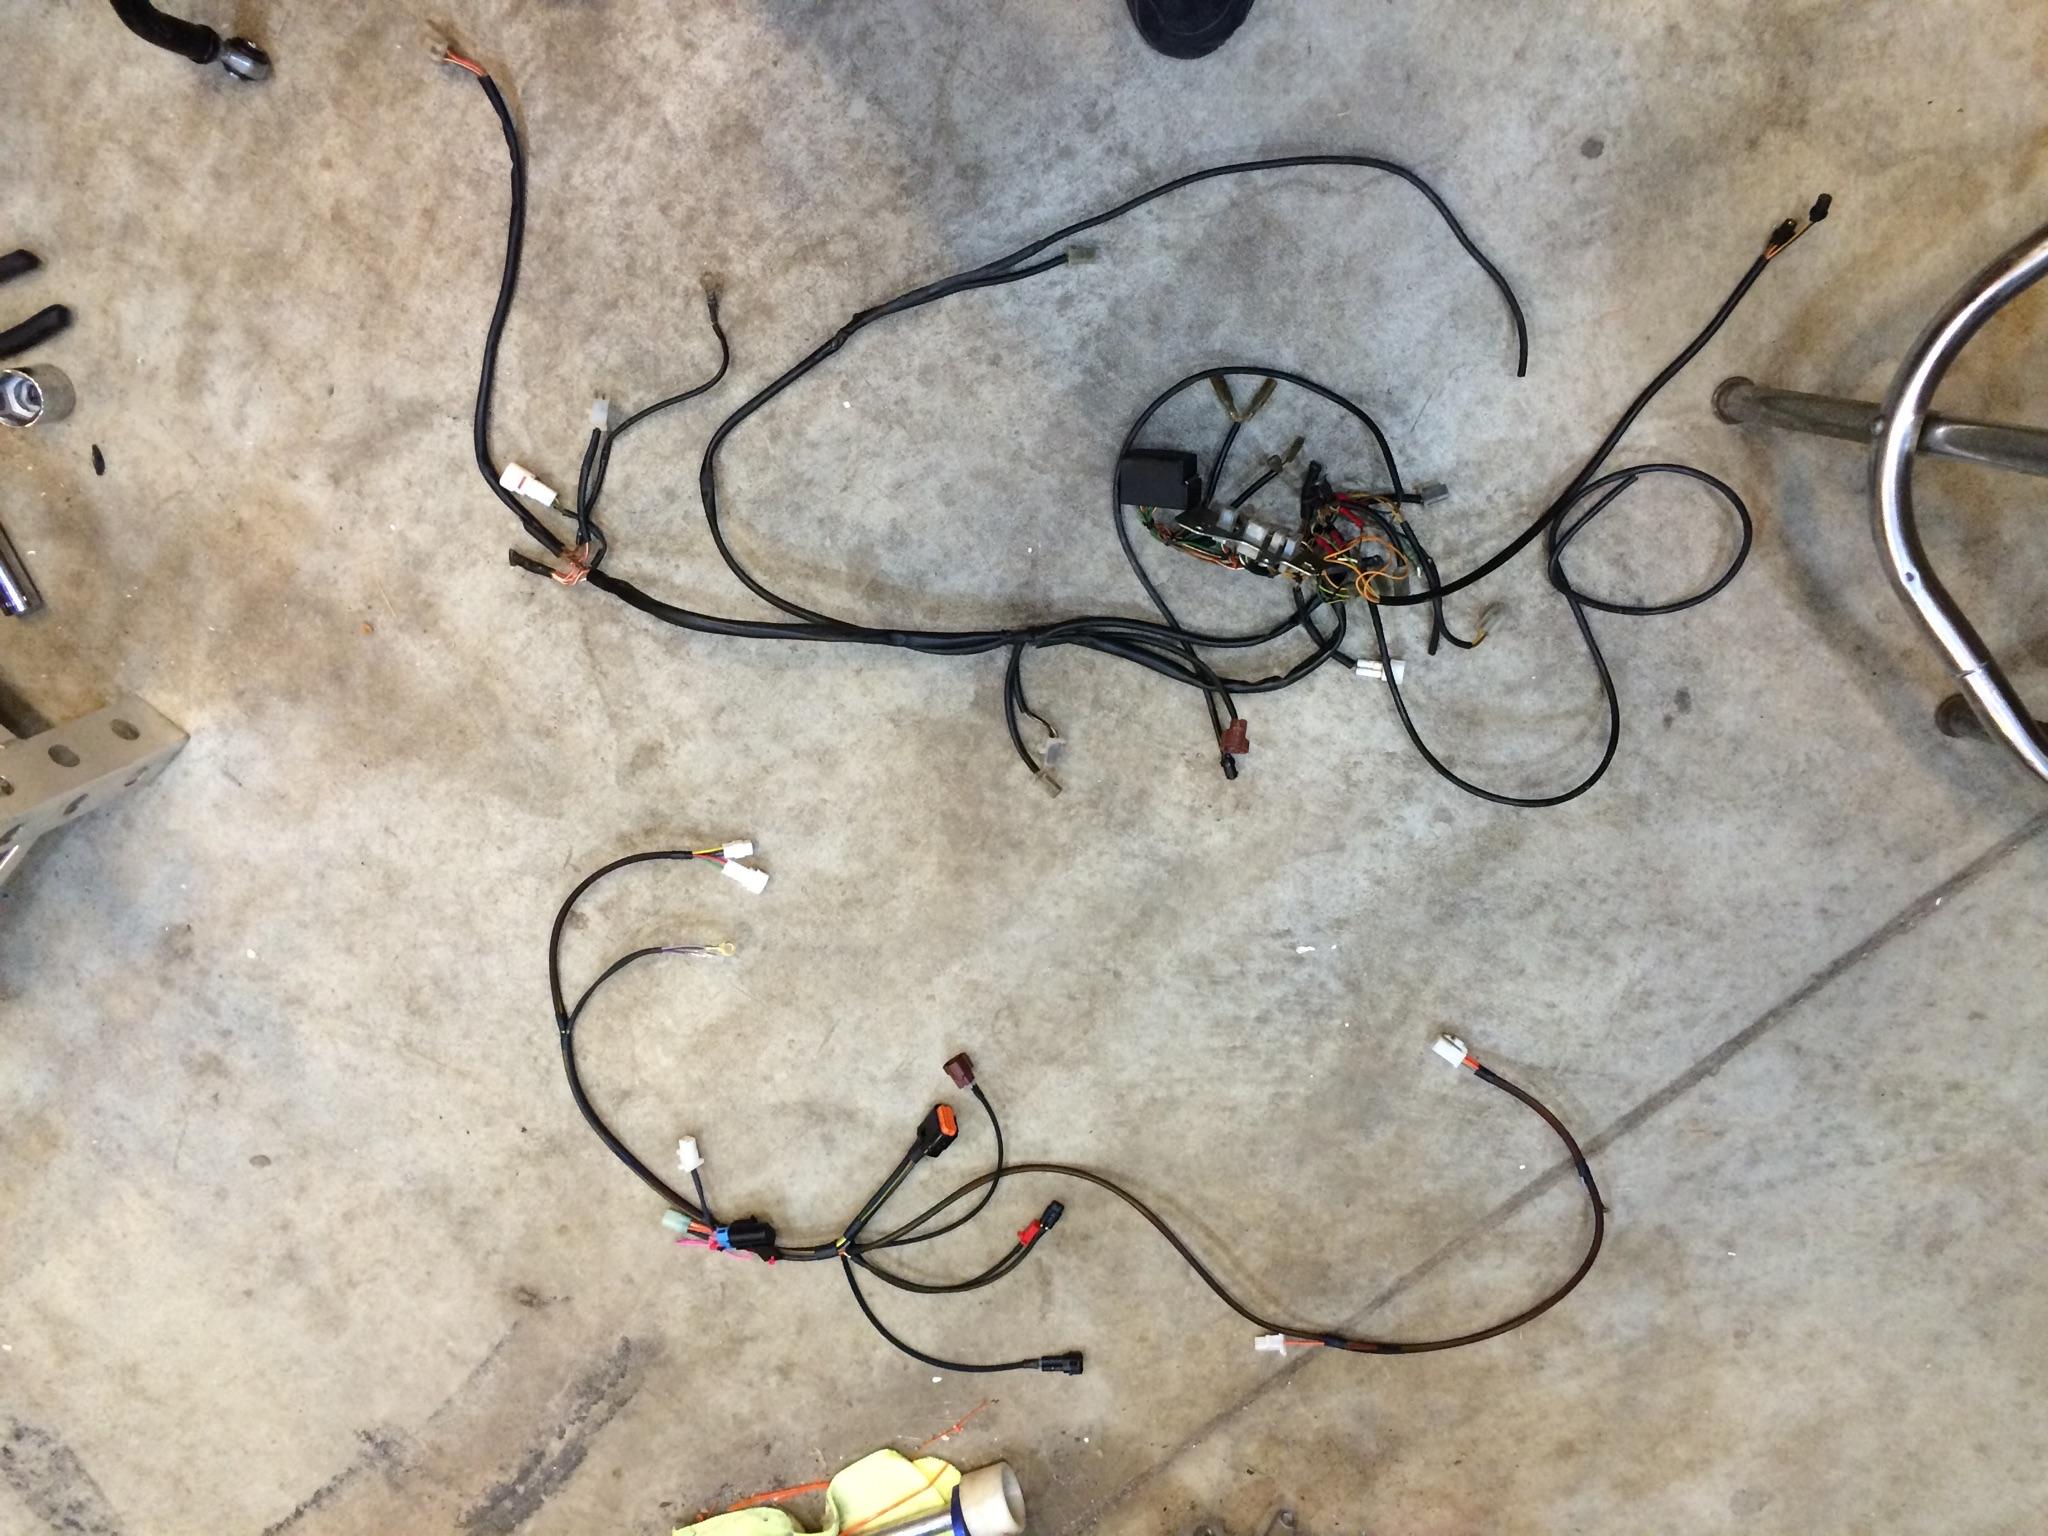
Below is a picture that one of my customers took and sent me prior to installation. The top harness is the OEM harness, and the bottom is mine. As you can see, everything that isn’t required to run the bike has been eliminated, making for a much simpler, cleaner, and easier to install harness.
Below is a diagram of the harness in PDF format so that you can see how much simpler it is, as well as for troubleshooting purposes for existing customers.
SRW 450/525XC Competition Wiring Harness Diagram
Retail cost is $225+shipping, including sealed connectors for your key switch and start button. Check out the FAQ below and if you have questions or would like to place and order, send me an email at [email protected]! Remember, several safety features of the OEM harness have been bypassed! This product is intended for competition use only!
FAQ:
What is it?
A complete, built from scratch, plug and play replacement for the stock KTM 450/525 XC wiring harness for competition use. This is not a modified or “race gutted” harness! Every connector and wire is new. In addition, several safety features of the OEM harness have been bypassed! This product is intended for competition use only!
What is different about it?
Several things that I learned from racing these ATVs since 2008!
Wire – KTM ATVs used several sizes of wire including some very small 22 guage stuff that doesn’t hold up to the vibrations that ATV racing subjects it to. All Schumacher Race Works harnesses are built out of 18 GA TXL wire with cross-linked polyethylene insulation which is resistant to heat, moisture, grease, oil, gasoline, most acids, and solvents!
Connectors – Most of the OEM connectors are maintained with a few notable exceptions. I have had several problems out of the stock key switch and start button connectors, so I prefer to supply the harness with sealed connectors for those and can either supply the mating connector for the you to install on your key switch and start button, or install them myself at no charge if you can supply me with your key switch and start button. I also keep switches and start buttons on hand if you’d rather start with all new stuff, and finally, I CAN supply the harness with the stock connectors, I would just rather not do so for reliability sake.
Fuse Box – The OEM Fuse Box is not sealed well and is bulky. The only fuse in the Schumacher Race Works 450/525 XC Competition Wiring Harness is for the fan. It is housed within a small, sealed enclosure which is compact enough to simply be zip-tied to the rest of the harness.
Unnecessary Connectors have been Eliminated – The OEM status lights can blow the main fuse if they short to ground. The clutch safety switch can act up and keep the bike from starting, the brake light switches and head and tail light wires can short and blow fuses. All of these things have been eliminated from the Schumacher Race Works 450/525 XC Competition Wiring Harness.
What’s with that braided plastic weave? Why not use a normal split wire loom?
The braided polyester sheathing is a pain to work with, but I do it for a few reasons: First, you can see through it, which makes it easy to inspect for broken wires. Second, it is lightweight and extremely flexible! Third, it makes it easier to keep your harness clean unlike that split plastic loom that usually winds up full of mud. The only negative is that the weave itself is more susceptible to abrasions from vibrating against the frame. I wrap the harness with electrical tape if I notice that the sheathing is starting to show wear from rubbing. I very seldom have to do this.
How do I install the harness?
I start with the CDI connector. I always wrap the cross-bar that goes between the two upper shock mounts with electrical tape as this is about the only place the harness sheathing tends to rub through. At the first split, the harness splits into 2 longer legs and has several individual connectors. The individual connectors are all cut to legth and are the start button, the TORS switch, the Thermo Switch for the fan, and the kill switch. The “primary leg” runs down the right side of the chassis, zip tied to it under the fuel tank and has the connectors for the fan, the coil, the pulse coil, and the TPS sensor. The “secondary leg” runs down the left side of the chassis and has connectors for the rectifier, chassis ground, and start relay. Once everything is connected, simply zip tie it into place! I strongly recommend the following:
1 – After the first ride or two, remove the bodywork and check the harness for rubs. If you find any, wrap the harness with electrical tape in these areas and consider making routing changes to eliminate the rub points if possible.
2 – Use dielectric grease in all connectors, especially the non-sealed fan, rectifier, start relay, and kill switch connectors to prevent corrosion! I recommend packing the back of these connectors with dielectric grease as well.
Why didn’t you eliminate the TORS?
The TORS switch has proven to be remarkably reliable. Once you know how to live with it and keep it in adjustment, (Check out how to do those things here!) the TORS switch has proven significantly more reliable than most of the workarounds I’ve seen.
Do you do custom harnesses?
At first, that was the plan. Unfortunately, like most folks, I quickly figured out that there are only so many hours in a day and spending hours trying to figure out what a customer wanted, then more hours trying to figure out how to do it, then more hours building it as a one-off, it quickly became not worth it. Instead, I’m offering a simple competition harness which is what most folks were asking me for. The fact that they’re all the same make them easier for me to make and troubleshoot and allow me to offer a wiring diagram so that my customers can troubleshoot their own setups. I don’t offer many custom options presently, with the only notable exception being a 12V accessory wire coming off the back of the key switch connector if desired so that the customer can easily add his own accessories. Since this wire is not independently fused, however, I don’t offer it as the standard configuration as it is a good way to blow the main fuse if you let it ground, and most of my customers never intend to run lights anyway.
Hello,
If they are still available, I would love to buy a complete race wiring harness with starter and key.
This is buy far the cleanest setup I have seen, and I would love to get rid of the unnecessary crap on my bike using your product.
Please let me know if you are still making these, and how I can purchase one from you and get it sent to Australia.
Thanks for your time!