(And what I learned from racing it for a full GNCC season in 2018…)
Introduction:
I tried for a while towards the start of the season to write this piece and wound up getting so bogged down in all the things that lead up to why I wanted to do the project, why I am the way I am, and several other background-type things that I never got around to finishing the article. Some day, I’ll probably just write a book about all that other stuff as I feel like there are some good stories to tell, but maybe I’m biased. Since I don’t want to forget all the fun details about this build between now and whenever I get around to writing “Confessions of a GNCC Quad Racer,” (working title) I’m just going to try to get this series of articles written, and work to keep my rambling in check. Feel free to email me, reach out on Facebook, Instagram, call, text, find me at the track, etc., if you want more information, and I’ll try to answer your questions.
The reasons for this project can basically be distilled down to a few bullet points:
- I’m a 2 stroke guy. I hate engine braking. I use my throttle for coarse work and my clutch for finer metering. I hate the noise that 4 strokes make, and all the heat, the complexity, and everything else about it. I genuinely believe that the four stroke revolution was a serious net-negative for off-roading in the US, but I wasn’t able to come up with a viable two stroke alternative for serious competition at the national level on ATVs. With the 2018 300 XC engine in a KTM chassis, very nearly every part of this quad is available from a KTM dealer, and with 3 other KTM quads in my garage, I have spares for everything, which means I had essentially already built the program around the thing before I even started putting it together.
- I get bored. Like… Constantly. I exist to find elegant solutions to problems. It’s what I do both professionally and recreationally. For better or worse, I had run out of problems to solve on the KTM 525 XC’s years before and was bored coming into my 10th year of GNCCs. I wanted something new and interesting and another 4 stroke wasn’t it. I’ve ridden everything and owned most things, even weird stuff like Cannondale quads and Polaris IRS Outlaws. Simply building another 450 wasn’t going to be interesting. I could have just kept riding the same quad I’ve rode since 2008 and run another year in Vet A, but I really wanted to try something different and agonized over trying to figure out what it was. In the end, I decided that if I could get my hands on an engine, I would do this project. If I could not, I would switch to dirt bikes, because while I’m admittedly awful at riding one, it’s interesting to me in a way the ATV market hasn’t been for a while.
- KTM made serious updates to the 2 stroke engines in 2017. This was a BIG part of why this project happened. They added a counterbalance shaft and completely redesigned the electric start system, turning it into something you could actually rely on. Non-counterbalanced dirt bike engines have a long and storied history of not working in a quad chassis, and the previous electric start system required frequent maintenance and couldn’t be used to start the bike when cold, because it 1) didn’t have to torque to start the bike and 2) the strain of trying to do so would break things. When I first saw the 2017 engine and read the specs, my long-time desire to build a 2 stroke hybrid suddenly got a lot more realistic.
Step 1: Procure (and prepare) an Engine
As previously mentioned, you’re going to need a 2017 or newer 250/300 TX/XC engine. Personally, I would stay away from an XCW/TE engine as they have a lower first and 2nd gear which makes the gear spacing through the first 3 gears very wide. To be honest, I feel like the gear spacing on the XC transmission is just a tiny bit wide as it is, so I would stick with that transmission if possible. The close-ratio SX transmission would probably be great as well, but you can’t get an SX engine with electric start, and the cases are different.
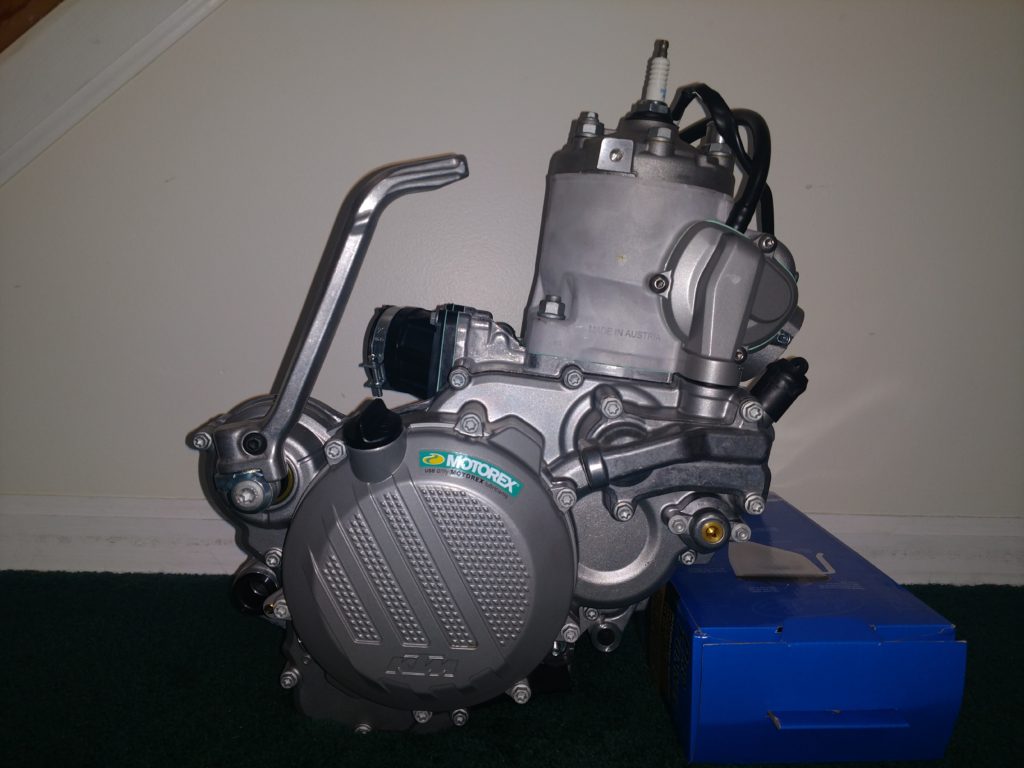
I was fortunate enough that AOMC was able to get a hold of a 2018 300 XC engine for my project. I was absurdly pumped the day it showed up, new in a box. It’s worth noting that you will want (or in some cases, need) to upgrade a few things on the engine before it’s ready for use in a quad.
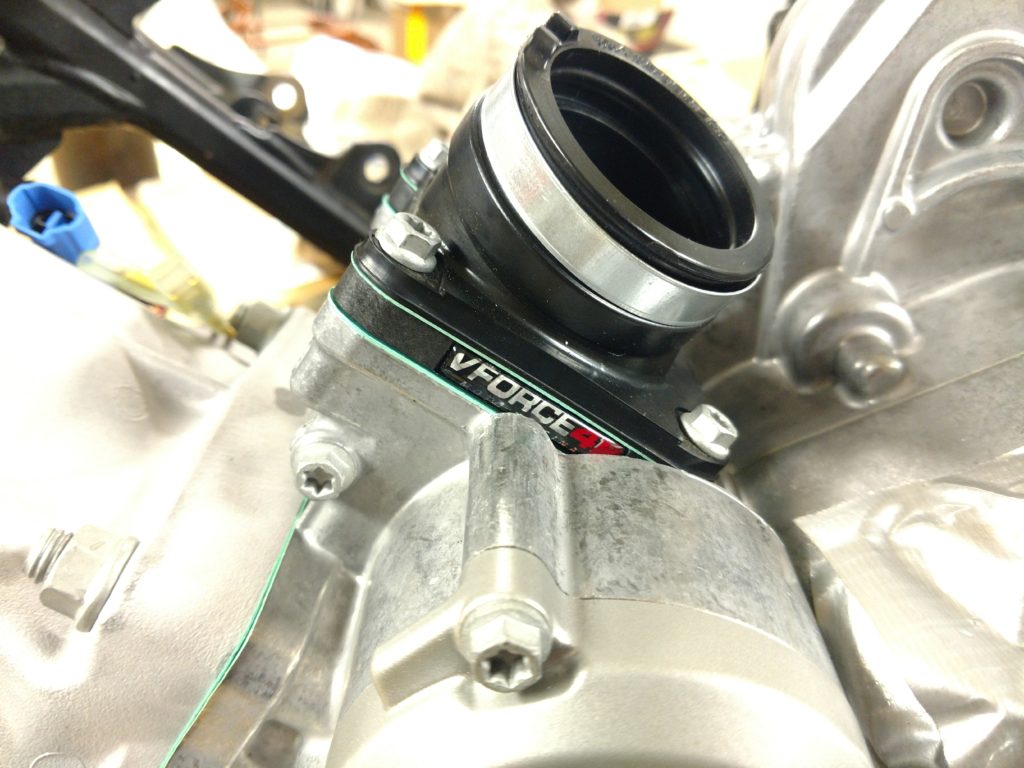
KTM decided to bring reed valve production in-house for the new engine. There have been several instances of the reed valve not sealing as well as the high end aftermarket components they have used in the past. I have had really good luck out of Moto Tassanari VForce4R reed valves on all of my KTM 2 strokes and decided that I wouldn’t bother messing with the new KTM unit. The VForcec4R was here and waiting before the engine even arrived. Also of note: the 2018 engine had a slightly re-angled carb boot. I didn’t try the 2017 unit, but if that’s the one you happen to wind up with and you have more issues than I did fitting a carb or intake, it may be worth looking into the 2018 boot.
You’re also going to want to upgrade the charging system. The stock system doesn’t quite keep up with the stock radiator fan. Since the fan cycles on and off, I made it through 7 full races before it actually caused a problem. Immediately after finishing the hot and muddy John Penton GNCC, I shut the quad off and when I tried to start it again a few minutes later, found that the battery was completely dead. I have had good luck with the high output DC setup from Ricky Stator on an old 450 RFS bike, while running the same fan wired to run continuously. The 2017 250/300 engine can actually mount that exact same stator and rectifier and since I’ve already had a history of good service out of the setup, it was a simple fix and has been completely trouble free since then. If you’re going to run a fan, you’ll want to fit the Ricky Stator system from day one.
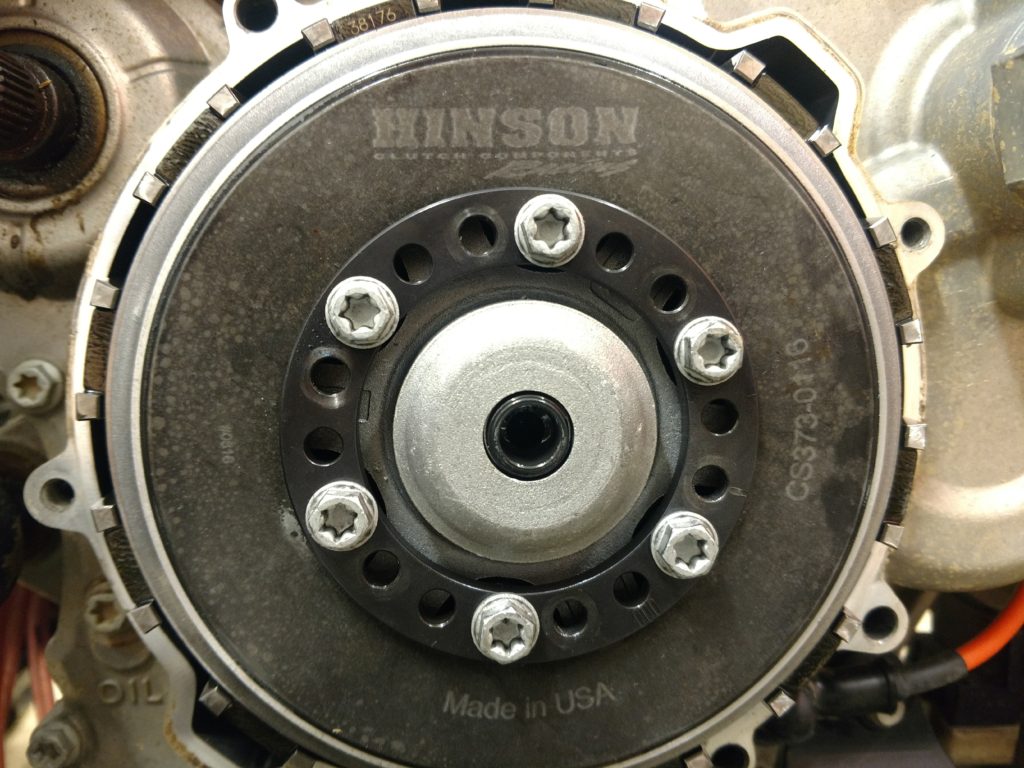
I would strongly recommend Hinson’s “Hi-Temp Belleville Clutch Spring” for the 2013+ KTM 450 SXF. I thought I might have noticed the clutch slipping in Florida at Round 2, but couldn’t tell for sure because of the power-robbing sand, and felt like it was fine when I got it back home. I thought I felt it slip once or twice again in Georgia at Round 3, but it was a slick clay mud race, so again, I couldn’t be sure. I tested on it at home again and it seemed fine. At Round 4 in North Carolina, there was no question that the clutch was slipping, even in the slick clay. By the end of that race, my plates were black and upon removal, the whole clutch pack smelled like smoke. Hinson’s upgraded clutch spring doesn’t fade when it gets hot like the stock one can, and is a tiny bit stiffer than the stock 450SXF spring. The clutch pull is still VERY light, and I rode from round 5 all the way to the summer break without changing plates again. When I finally did swap the plates, they still looked brand new. For the extra weight and traction of the quad, do yourself a favor and install the Hinson clutch spring before you even start the engine.
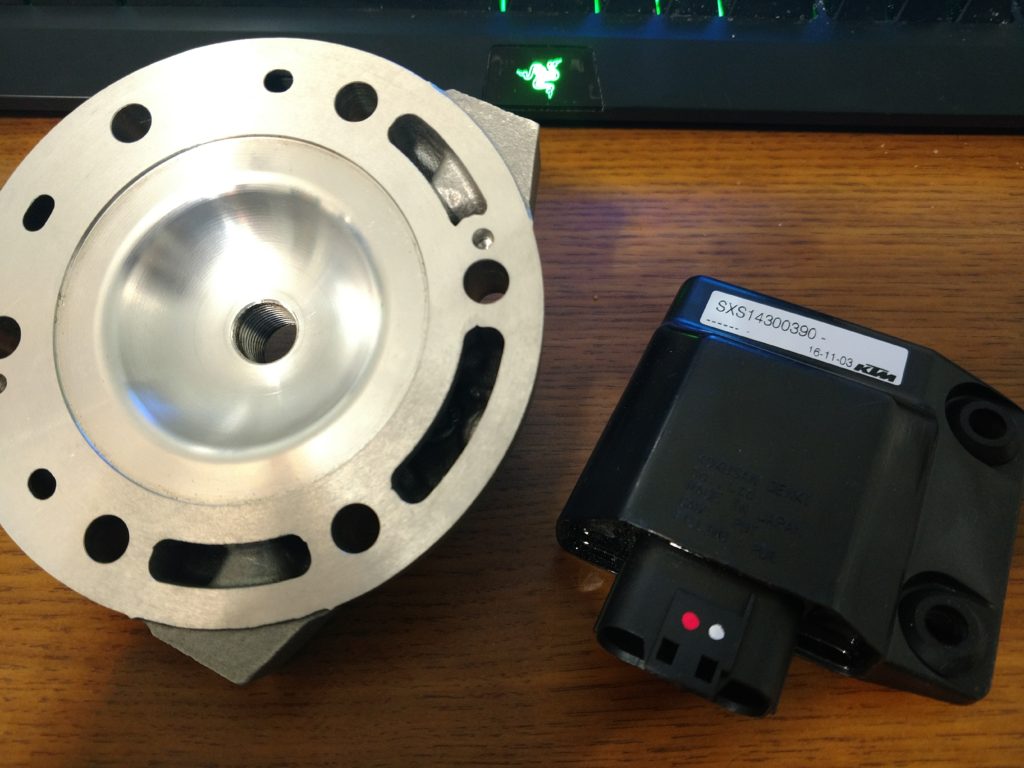
For a bit of extra snap, I also removed the head and sent it out to Jeff Slavens at Slavens Racing to be modified. Jeff decks the head and sets the squish. The extra compression gives a significant boost to the low-end and doesn’t require race gas. Jeff charges $60 for the mod, turns it around quickly, and is always fantastic to deal with. To compliment the higher compression head, KTM made a 300 SXS CDI with a more aggressive timing curve that adds power from bottom to top. Since I needed to buy a CDI for this project either way, the SXS unit was free horsepower.
Step 2: Set the engine in the frame, run the swingarm bolt through it, step back and take a good look at it.
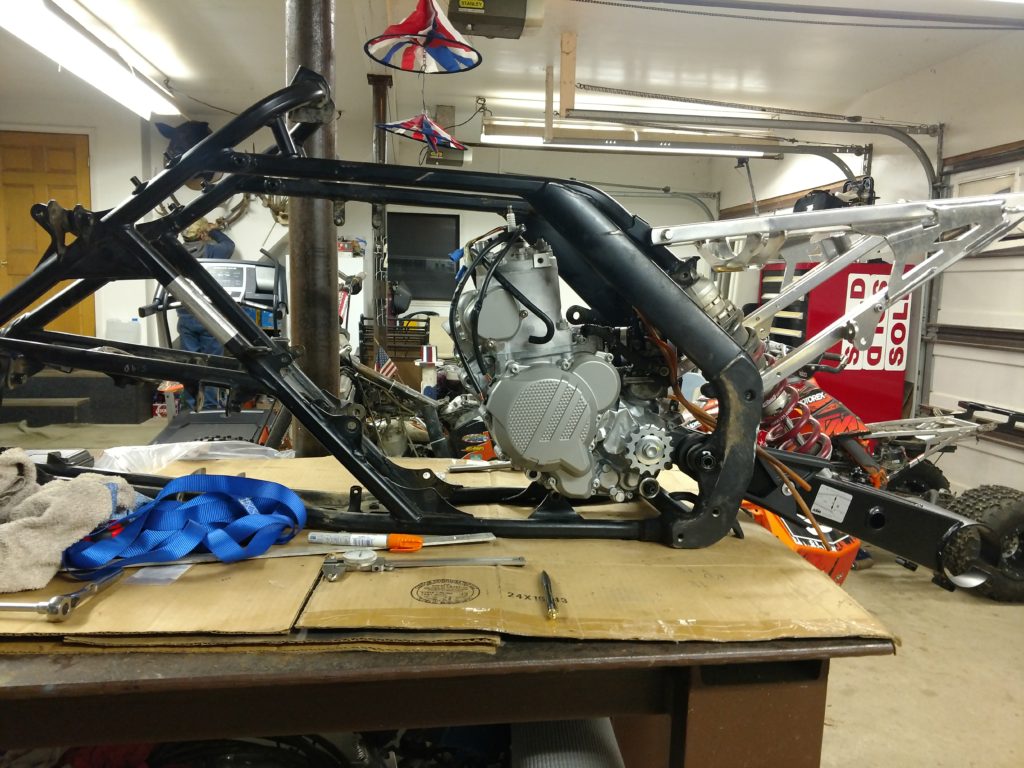
The first reaction was a satisfied smile. The brand new 300 XC engine already looked awesome in the quad chassis, and it looked like we had all the room in the world to work with. As soon as we started measuring things, however, we realized that nothing was where it needed to be, and it seemed like everything interfered with everything else!
Step 3: Panic.
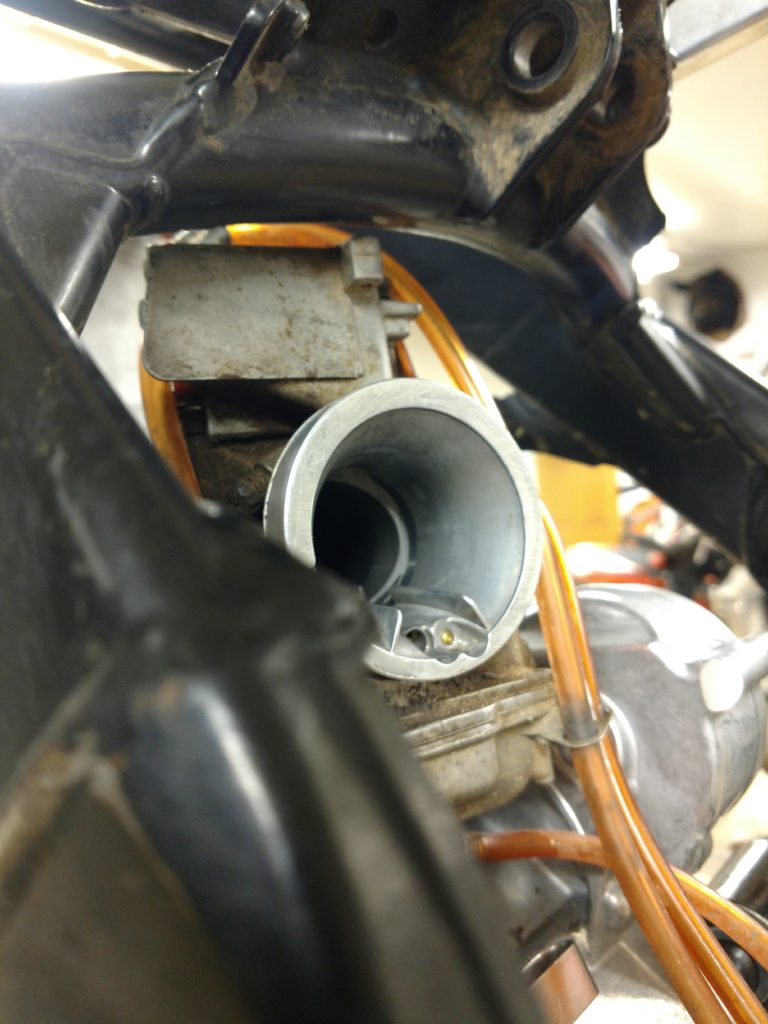
Over the first two days of the project, it became obvious that this was going to be a bit more involved than anticipated. The plug boot interfered with the gas tank, a long body PWK was NOT going to work as there was a frame tube where the cap and throttle cable needed to go, the sprocket was too low which was going to change the anti-squat compared to the 525 engine, (which was something I was adamant that I didn’t want to do…) and the only way to fix that was to pivot the engine up until the entire cylinder head was in the fuel tank, at which point there was no room for any sort of carburetor at all! There was no room for an intake, and the lower engine mounts needed to be removed before we could even try to figure out where to put things, meaning this frame couldn’t easily be converted back into a 4 stroke XC in the future, which was still something I wanted since we didn’t know at the time if this 2 stroke engine was even going to work in a quad frame. It was Thanksgiving and I didn’t have time to try to solve all of these problems, so I just took a bunch of pictures, made notes, and went back home to Ohio after the holiday to start buying parts and materials and try to come up with a plan.
The next few weeks, I did a LOT of research in everything from intake design and anti-squat geometry to what materials to make engine mounts from. Fortunately, I definitely was NOT bored!
Part 2 Coming Soon!

casino x рабочее
казино икс сайт
perdere peso velocemente
Tampilan gambar yang jernih juga akan semakin memanjakan penggunanya.
My web blog – layarkaca21
2015 Ford F-150 Regular Cab Pickup, Dark Green – Welly 24063WGN – 1/24 scale Diecast Model Toy Car
Wooden boat in the ocean Morro De Sao Paulo Tinhare Cairu Bahia Brazil Canvas Art – Panoramic Images (15 x 6)
Hey there! I just would like to offer you a huge thumbs up
for the excellent information you have got right here on this post.
I will be coming back to your website for more soon. https://vanzari-parbrize.ro/parbrize/parbrize-mini.html
internet payday loans loan options loans direct lenders
покер дом казино
poker dom ru
вулкан slots регистрация
вулкан slots регистрация
5 Stars https://vanzari-parbrize.ro/geamuri/geam-renault-megane_ii_bm0_1_cm0_1_-2003-91425.html
come perdere la pancia